Top Ad 728x90

Court of the Dead
Showing posts with label artist. Show all posts

Nov 5, 2016

Visual Storytelling Seminar by Dave Pressler at Stranger Factory Sunday Nov 6

by
With over 20 years of experience in character design, art direction, and animation, Emmy-nominated artist/animator Dave Pressler is excited to announce his upcoming seminar Visual Storytelling alongside his exhibition at Stranger Factory. If you have ever wanted an in-depth look or introduction into character design, visual storytelling, and storyboard techniques then this workshop is a must!
Dave will outline the basics of character design, its relation to story telling through pose, gesture, and visual development while relating back to his professional experience. He will additionally teach basic storyboarding techniques: the cornerstone of good visual storytelling.

An excellent introduction for anyone interested in animation, illustration, or character design, Visual Storytelling will be held Sunday, November 6th from 12:30 pm – 3:30 pm)

Workshop: Sunday, November 6th - CLICK HERE FOR FULL INFO
  • Workshop is 3 hours long (12:30 PM – 3:30 PM)
  • $50 per student
  • Space is extremely limited
  • Students 18+ only

Bring your own sketchbook, and drawing supplies / A limited amount of sketchbooks, storyboard books, and drawing supplies will be available for purchase, day of event.
To book your spot, contact the gallery by emailing strangerfactorysales@gmail.com or calling 505-508-3049

Aug 19, 2016

Hobbes Sculpture by Rich Page of UME Toys

by
This was a commissioned piece sculpted by Rich Page, a UK artist aka UME Toys. You can't have this one, because it's got an owner already, but you can hit Rich up here to commission your own. Calvin & Hobbes is near and dear to my heart, as my father read it to me on Sunday mornings when I was a kid. An adorable 3D rendition of a beloved character which will forever live deep in my subconscious, child brain.  Nice work, Rich.

Jul 17, 2016

Franky Tequila Custom by Spanish Artist Fer MG

by
Fer MG presents Franky, a Tequila Muttpop custom based on the Frankenstein monster. This 9 inch custom has light up LED eyes and comes with a dungeon floor diorama with chains holding the creature. LEDs light up by pushing the on/off button on the back of his head. It´s painted with acrylics and protected with matte varnish.

This piece is on sale on www.fmstudio.es at $150 free shipped (with tracking number)

Fer MG accepts commissions by email at fer.mg.studio@gmail.com
For more info on Fer MG, check his social media:
-  Instagram: @fer.mg.studio
-  Twitter: @fer_mg_studio


Jul 28, 2015

INCREDIBLY Talented Artist Jason Jacenko has Massive Stroke, Needs Your Assistance via GoFundMe

by
I wouldn't wish a stroke on anyone, but it hits closest to home (for me) when it's one of US. And by us, I mean this small, intimate art toy community. It happened to Andy (ToysREvil) and he will be the first to tell you that post-stroke life is NOT EASY. Regretfully, it sounds like Jason's stroke was even more severe than Andy's was, and he's going to need outside help to continue his art career.... to that end, Jason's partner Sally Ann has set up a GoFundMe campaign here to help aid in his care


Jason Jacenko aka Atomika aka 696 Ink Tattoos has produced some of the most whimsical, detailed and gorgeous custom toys we've ever seen.

A Google Image search of Jason's toys just mind-blowing.

Please give a little to this artist who deserves your help.
I just donated.


- Benny Kline


969 Ink (tattoo studio) 


Jul 24, 2015

HOW-TO: Photograph Custom Toys at Home, On a Budget (Part 1 - Setup)

by
Intro:

So I have this thing I'm doing called Rollin Gobis. It's a rolling online custom show featuring the Muttpop Gobi platform - a 3.5" vinyl humanoid (luchador) figure which is basically part of the lime of toys that the popular Tequila came from.

As I gather up my images for this release, I had one custom Gobi by Cash Cannon left to shoot, and I thought I'd take the opportunity to show all of you how to photograph a custom toy for the web. Initially I thought this might be a short tutorial but I realized that not all of you have access to the same DSLR camera and Photoshop like I do. So... those tools are great for me but maybe not a useful tutorial for many of you.

The reason I am doing this is the same reason I've been bitching and whining about your images for years: when you sell stuff on the web, the images are all you have to make an impression. They have to look pretty good and professional, even if you do them yourself.

Many of you seem to fall back on the good old "shot in dim lighting on my kitchen table with busy background" shot. Please stop doing that. I know many of you are working a day job and sculpting at night, and you're exhausted by the time you finish, but also super excited... so you snap the first picture you can of that piece, at night, on your table, in front of your bored cat and overflowing garbage can. And then you post it to IG because you're all proud, and some bloggers pick it up and run with it, and BAM - that's your actual official picture that gets circulated of that piece.

So your pictures look like you don't give a shit. And that's bad. Whether you want to believe it or not, there is psychology involved in selling your art to people, and you have to appeal to their inner sense of "must have this thing right now." Not giving a shit, in sales, leads to not selling shit.

So, to recap: your images of your custom toys should be brightly lit, against a white (preferably completely blank) background. 

MANY of you don't seem to think you able to produce images like this without hiring a photographer, but you can. In this How-To series, which I think will be 4 posts long, I will show you how to: set up your photoshoot, edit the images on your iPhone, OR edit the images in Preview if you have a Mac, OR edit the images in Photoshop if you have it. All with the intention of creating nice clean images that help sell your artwork. So, 3 different image editing options according to what equipment/tools you have available. I chose this particular figure to demonstrate because black objects (and sometimes white objects) are the most difficult to photograph. This piece by Cash happens to be both black AND glossy, so it's actually pretty difficult- all those reflections plus a high contract between object and background.

Part 1 - Setup of your Photoshoot
So here we have the awesome Vader Gobi

A "seamless" is a piece of equipment for a photo studio into which you place the object to be photographed. The intention is to give you proper light and a nice clean white background behind the object.

You can buy a seamless pretty much anywhere. Google that shit. They're not expensive.

I don't own a seamless, despite having considered myself a photographer for a while.

I make one every time I have to shoot a toy in my home.

How do I magically make a seamless? you may ask... well, I'll tell you, slappy: it's a piece of damn paper.

Yeah that's right, regular old printer paper works just fine.

So basically, I did this shoot at about 10AM today when the light was shining right into my kitchen through the window. I chose this time and location because ambient light (the amount of random-ass light in the room) is strong here.


On the floor I placed a heavy, clean, white envelope that is supposed to be used for shipping prints. It's big on purpose, just to give me more white space to work with. Taped to the side of the cabinet is a regular piece of white paper, low enough that almost half of it hits the ground and curves. That's a seamless right there. It prevents the viewer (the camera) from seeing a line between a floor and a back wall inside the frame of the image.

So you can see right at the bottom of the shot above that the patch of sunlight gets really close to my little shitty seamless.That's awesome and intentional. Sunlight (natural light) is great but being in DIRECT sunlight makes for really difficult photography. What you want is AMBIENT light bouncing all around the room, lighting up your subject from all angles (instead of hitting it directly on the top and making really dark shadows right next to really bright spots). The sunlight will get close to Cash's Vader but will not hit it directly.

If you or I owned a professional seamless, there would be one or 2 lights affixed to it that would achieve this ambient lighting effect. And it'd be better... but we don't have a seamless and this makeshift shit will work just fine for us to sell items on the internet.

From the side, the seamless looks something like this. You can slide the curve in or out as needed.

So I place the feet of Vader right at the edge of the paper to hold it down flat.

Above you see the subject right up at the edge of the seamless, approx 4 inches from the back wall. Feet of the toy hold down the edge of the paper. You can also do this with tape if needed. Keeping that edge down flush is key because we are doing a bit of half-assed editing after the shoot, and I want to keep the work as basic as possible so you can execute without having to use a clone stamp or some weird tool in Photoshop to remove the shadow that would be created if that edge wasn't flush.


This image shows a tiny shadow under the piece of paper near Vader's feet. I can edit this out in Photoshop but just try to do a better job than I did in eliminating that shadow and you won't have to edit it.

Above are the unedited shots from this photoshoot. They have not been cropped or adjusted. These were taken on an iPhone 6 Plus with the HDR setting turned on. All iPhones have decent enough cameras for this, and many of the Samsungs and other smartphones do too.

All that weird stuff like the edge of the paper, the shadow cast by the figure, the different colors of the envelope on the floor vs the paper, and the crap on the floor in the background will all be edited or cropped out.

That's it. In the next post in this series, I'll show you how to edit these images on your iPhone.
Good game.


Jan 1, 2015

Planning for the New Year: A Basic Guide for Self-Employed Toy Artists & Customizers

by
Ian Ziobrowksi painting a custom Dunny for the Dopevinyl 
Kickstarter intro video - image credit: Jordan Ahern
Happy New Year everyone! As we all look ahead to this new year, we are filled with hope and excited to build upon the successes of last year.

But what does that mean, particularly for self-employed toy artists?

This post is intended to set a direction for toy artists and customizers and give some guidelines about decision-making in 2015. Some of the points I'm going to make will also be useful for artists of all kinds, and other small business owners in general.

Here's what I think you should do:

1. SELF-ASSESSMENT - Assess your sales from this past year. Do you have a list of the pieces you worked on, with the amount of money you sold them for, and what you profited out of each one? If not, work back through your paypal and try to figure it out. Make a list of pieces you made, both sold and unsold. Create a spreadsheet, do it on a piece of paper. I don't care. Anything to better assess what you did in the last 365 days.

2. WATCHING THE BOTTOM LINE - Which pieces made you the most money? Did you make a series of pieces that were particularly successful? Why were they successful? Did you sell a piece for a higher amount of money? And if so, did you profit MORE off of that piece? What I am trying to have you do is figure out what made you the most money (profit, not just gross sales) with the least amount of time/effort spent. This is the type of project you should focus on in the new year. Not 100% of the time, but you should be aware of the types of projects that are best for your bottom line, and do more of them.

I frequently urge my friends to stop creating giant $1500 OOAK sculptural pieces and to start producing runs of 3" resin figures, for example. Why? Because normal people don't have $1500 to drop on a 3 foot tall sculpture. But 90% of collectors DO have $40 or $50 they can drop on a small pieces that have been hand-detailed by you. It's infinitely easier to create, promote, sell and ship 3" pieces, especially when you have 10 or 20 or 50 to sell. This is my businessman side battling with your artistic urges. I know you all WANT to make those epic pieces... but unless you have a buyer lined up, I'd try to keep the epic pieces to a minimum each year. 2 to 6 maybe, if you can sell them. The rest of the year, make sure you have items in the $20 - $100 range to sell. Remember, the buyer that has a great experience with you buying a $10 sticker pack might be the one that comes back and commissions a $1000 piece later.

3. PROMOTION - Which partners helped you the most? Did you collab with someone with a bigger network? Did you sell via a shop or gallery? Was it easy, or profitable? Did they promote you? Who got your name out there the most this year? If you don't know who provided backlinks to your site, try this: Go to Google, type linkto:http://www.yourwebsitename.com in the search box. Then, click on the Search Tools button, and choose "Past Year."

Poke through them, all of them. You'll see who's talking about you. This works for checking backlinks to your website, shop or blog. Any web address.

Backlinks also help you in terms of Google- Google likes sites with more backlinks. So try to get links back to your site / blog / shop on as many OTHER sites as possible. Do this simply by being nice and asking the owner of the site. Nothing underhanded here. Just ask. Any toy blog works, so don't be shy about emailing Andy, Jack, Spanky & Nick, myself, Gary, Chris, Ben & Travis and all the other people who write about toys. If you don't know who all of those people are, and you create custom toys... stop now. Go back to Google. Search for "toy blog" or "art toy blog" and make a list of which ones pop up. There's a limited number. Find an email for each of those blogs. Put the emails on the list. Create a "group" in your email system, or a mailing list, containing the emails of the toy blogs you wish to connect with. EVERY TIME you have pictures of a new piece to show, email the blogger group email list you just made. Give them: clean pics of your piece, description of piece, size, material, backstory, quantity, price and MOST IMPORTANTLY A LINK TO WHERE READERS CAN BUY THAT ITEM.

I can't believe how many of you don't do this regularly and it drives me batshit crazy. If you want to sell stuff online, you have to tell everyone that you have stuff for sale online. And the best people to tell are the people who post shit online all the time and have a big following. Read: the 10 most active art toy blogs. Email them.

Just so you understand the concept of networks, think about it this way: if you are selling your car, would you reach more people by handing out leaflets at the local CVS, or by placing an ad in a national newspaper? Take advantage of the bloggers' larger networks to help promote your work.

I've heard that some of you don't like self-promotion. REALLY? Do you like selling your art? Which one do you like more, cuz unless you have full-time management, or you're represented by a gallery, your ass better start enjoying, or at least practicing, self-promotion. No one is going to hand you success on a silver platter. You have to fight and claw your way into widespread recognition by yourself. Step one of that process is reaching out.

4. SOCIAL TIME - Do you have a personal Facebook page? Great, so do I. Do you have a business page for your art, or a fan page or whatever? You should.
What's the difference, you ask?
Well, say I'm an art collector. I find out about your art, but the only FB link I can find is to your personal page. You post pics of your artwork, sure, but also pics of you and your friends drinking, some fried chicken, how angry you are at your ex, how no one buys your art, and a picture of the street because it's raining.

WHO. THE. FUCK. CARES.

If I'm a prospective art buyer, I literally give zero fucks about your chicken and rainy days.

Show me the damn art. Gimme a link where I can buy it.

Start a FB business page, keep a FIRM divide between the types of stuff you post on your personal page (all kittens and chicken) and the art you post on your business page. Business page is ALL BUSINESS: new items, promotions, WIP shots, cons you attended (no fried chicken pics please, we all go out to eat after cons, no one cares), etc etc.

Many artists create a reality - an alternate personality or a whole alternate universe - online to support their art. I'm thinking: FriendsWithYou, tokidoki, Vamplets, shawnimals, Suckadelic... there are thousands of others. They do not post about their art products as regular people who eat fried chicken, they post IN CHARACTER as an entity that exists in a world they have created. I'm not saying all of you need to go this far, but I am saying that there can and should be a divide between your own personal life, and the worlds you are creating in your artwork. Unless your artwork is inherently tied to your physical person and your real personality in some way, there' no reason why your art clients need to know about how cute your kitty is and your thoughts on Obama.

On that note, here's one I need to practice as well: seriously stop dicking around on Facebook. Add up all that time, over a year, posting stupid crap to your personal page and surfing your news feed, and you've just clocked in your LEAST productive year ever.

Get on FB for 15 minutes a day: spend 10 uploading pics of your artwork to your business page and captioning/tagging them properly with LOTS of info and links, spend 5 minutes responding to FB messages, then log off. Any more and you are seriously wasting your life away.

See what I'm doing right now? I'm making a valuable blog post. I AM spending my time on this. Guess what? As soon as I hit Publish, it's sent to my FB business page! Automatic update. So easy. It's also sent to my business Twitter, my Tumblr and Google+, and packaged into an email that's sent to my blog email list subscribers. If you don't understand how to have that done automatically, let me know in the comments and maybe I'll make another blog post about just that type of system.

The benefit of making this post on a blog as opposed to on FB is that Google searches my blog for content and does not search Facebook for content (April 2015 edit: Facebook business page info is now searchable on Google). Blogs are inherently more useful than Facebook for that reason. The Facebook search feature (for content associated with keywords) sucks. So no one ever uses it. Everyone searches Google.

TL;DR - 
  1. Analyze your sales.
  2. Figure out what made the most money with the least effort and do more of that.
  3. Figure out who promoted you and court them.
  4. Get serious about harnessing social media and web content to steer your business.
I hope that helps you focus a bit in the new year. Sorry I got all ranty. (edit: I am no longer sorry) Please leave a comment and let me know if this was helpful, and if I missed anything you wanted to hear about.

Sep 19, 2014

NEW Lavabear shirts by Nathan Hamill at outsmART Originals

by
Outsmart Originals is proud to present two new incredible releases from artist Nathan Hamill. Based on his iconic designer vinyl figure, Lavabear, we are thrilled to be working with Nathan on these new releases. We have two t-shirt projects dropping in October with the first being ‘Lavabear Rising’ featuring the vibrant and sharp, eye-popping color design screen-printed on ultra cotton tees.

The second release, ‘Lavabear: Artist Edition’ depicts the character in an original hand-drawn design by the artist.  A mix between minimalism and abstract styles, the artist has created a classic version of Lavabear that is easily identifiable as well as fascinating.

**Both releases are now available for pre-order and will only be printed to order and are scheduled to ship in October. Men’s shirts will be screen-printed using ultra cotton tees for a classic and long lasting fit while the women’s tees will be printed on soft-style ring-spun cotton jersey tees for a flattering fit.

Join the Lavabear clan and proudly show your support for Nathan Hamill’s loveable creation.

"Lavabear was once a shapeless, colorless being created from stardust by The Those. Over time, he rose into a vibrant, ursine-esque creature.
His sole purpose was to guard the entrance to the Sacred Realms of Märchen and, along with it, its memories, treasures, and secrets.
The legend goes that if awoken from his deep hibernation, those foolhardy enough to trespass on his Sacred Grounds will be met with a terrible and ancient wrath.
His paws, it was said, shall lower, igniting the Eyes of Ulyssia and, with it, one thousand cursed flames. Once alive, Lavabear will seek down the intruders and bury their bones in his fiery belly…
…returning him once again to his deep, sound slumber."

- Nathan Hamill

Some seriously f#cking cool designs from amazingly talented artists.

Jan 9, 2014

CLASH OF THE TITANS 1:6 SHOW

by
We are all familiar with the usual suspects of the 1/6 world... SideShow, Hot Toys. Enterbay, Medicom etc etc...

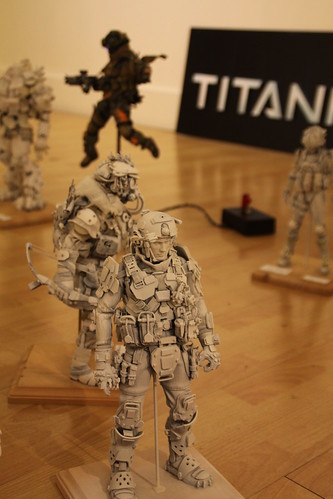
But lurking underneath all that.... there is a vast world of 1/6 figure customisation and production, creations that you may not know what the subject matter is but what these artist produce is somewhat amazing, I myself have a few pieces from these artist and its always a talking point when people visit my office.

OK, Clash of the Titans - what is it?


Well the good people at 1:AM Gallery are putting on a show that I think brings the best of these artist from around the world, into one gallery....

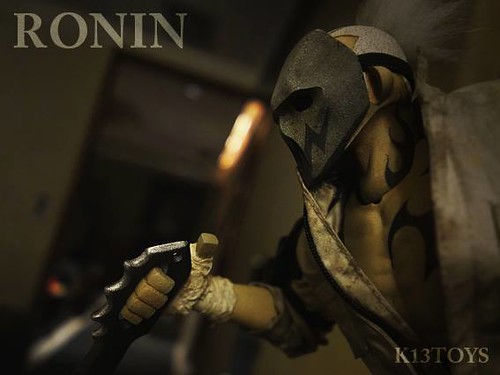
Joel Emslie, Winson Ma, Kenny Wong, RC Works, 1000toys, Psycho Customs, Zuno, Ligh BLACK, K13 Toys, Brac, HiKiKoMoRi Studio, makadi 3000, AX2 Studio. I'm sure you may of heard of a few of them.


Shame I live so so far aways as this is a great opportunity to see so many talented artists work in one place,  BUT if you live close then I suggest you head over to 1:AM gallery tomorrow for the opening night, you won't be disappointed.

First Amendment Gallery
1000 Howard Street
San Francisco
CA 94103

Lets hope James the curator can organise something like this for Europe in the future (James and I have spoke about a UK/EU show but only briefly)


Thanks for reading

Wai Man
www.onesixthbruce.co.uk

Nov 18, 2013

Martin Hsu and OneSixthBruce Exclusive - Dragon Boy Brucey

by
Martin Hsu and OneSixthBruce are pleased to bring you a very special release of Martin's ever so popular Dragon Boy

Dragon Boy Brucey


A tribute to the great Jeet Kune Do hero to be release on a very special day -  27th November 2013

'If you love life, don't waste time, for time is what life is made up of'

Dragon Boy didn't waste a second to don his tribute to the great man.

Dragon Boy philosophy is simple..... Live life each day to the fullest you can, and the next day will be better than the day before

Available to order at 5pm (GMT) 27th November 2013 at www.onesixthbruce.co.uk 


Standing proud with a smile at 7.5'' Tall!!
Articulated parts - Head, arms and hands
Designed by Martin Hsu
Sculpted by Vin Teng
Produced by VTSS toys

Limited to 99 pieces only

Cost will be £68.00 + shipping

Delivery will be approximately 2 weeks after order


Thanks for reading!

WaiMan
www.onesixthbruce.co.uk

Nov 2, 2013

Artists of Instagrim Blind Box Custom Series

by
Introducing the Artists of InstaGRIM: a custom Halloween Blindbox Series co-ordinated by @jaykblu & @_wire_wolf_ 

You can pick from the Zombie, Demon or Artist Special Blind Boxes!
- Instagrim.storenvy.com -

The box art and logos are designed by the talented @jangosnow

Instagram Artist Roster:
@mikedie @melodreama @larart @krunster  @hanky_pants @brentcheney @kool51designs @matts_contact_sheet @darrenklangclegg @tattoo_dave @hungry_gh0st @rottendaughter @eagon @mrthesanders @chaserangelo  @stklbck @claynexted @necrostrife @loonaiii

Available now at instagrim.storenvy.com


Jul 23, 2013

Design a Dynomighty Wallet, Get Sales, Get Paid, Go Global!

by
Dynomighty Wallet design by SENaspace
Dynomighty Wallet design by SENA


Dynomighty Announces their "Artist Collective" program, designed to encourage submissions of new designs for their MightyWallet Tyvek wallets. Tyvek is that crazy material the USPS uses in their Priority Mail packaging. You can print on it like paper, but it doesn't tear.

Artist Collective is a creative channel where up and coming, developed, or masters of the fine arts can produce a MightyWallet® of their own design. Artists from around the globe have joined in and started sharing their art to inspire others...not to mention create an amazing wallet! Once the artist's design is approved they can choose to launch it immediately or save it to coincide with a show or event to help cross-promote. It puts the power of promotion into the artists hands.

Once the design is launched, there is a 30 day window in which they will need to have 30 backers support their design. If the wallet design clears the 30 by 30 challenge, the wallet will go into production. Any and all backers will receive the wallet. A few of the most successful designs will be offered to over 1600 stores across 66 countries around the globe. So not only do you get to create a wallet of your own design, but if your design clears the 30 by 30 challenge, it will be seen around the globe.

This unique project is part of Dynomighty's commitment to encourage art and design. Founded by an artist, Dynomighty has and always will support art, artists, and those that choose to Be Mighty!


Dynomighty Wallet design by Alisa Yang
So here's the thing: if you're an artist, and you are ALREADY producing artwork in various forms to sell online, you should DEFINITELY take advantage of this program to get products with your art on it distributed around the world. Worldwide recognition is NO JOKE. As an artist it should be your main goal, if you hope to support yourself on the sale of artwork alone. You're gonna have to sell both original art, and products like this with your art printed on them, in order to make it.

And you KNOW I would never push you to do something that's a waste of time. Money MUST be the end goal.

Basically the program works like this: go here, click on CREATE, and upload your design. From that point you have 30 days to get 30 people to pre-order your design. That's as easy as a little social media work, or blogging work, or an email blast to your mailing list (because you DO have a mailing list, right?). MightyWallets are $15 at retail- super cheap for customers. If you have a mailing list of 300 people, and you might get 10% to spring for it, you're golden.

You can see this process in action here, where buyers would browse designs.

OK so once you get 30 of your people to back your wallet design (it's like a mini 30-day Kickstarter), your wallet goes into production. Your backers pay and get theirs and ALSO you get 15% of the profits generated by the sales of your wallets on the Dynomighty site.

ALSO, the most successful wallet designs are offered up at wholesale to Dynomighty's impressive network of retailers in 60+ countries!

To sum up: if your design goes through, you get MONEY and GLOBAL RECOGNITION. What the hell are you waiting for?


Go find Dynomighty on their website, Facebook and YouTube.


Dynomighty Wallet design by ieatcoffee

Dynomighty Wallet design by hero

BB-8 Star Wars Premium Format(TM) Figure
Court of the Dead The Chronicle of the Underworld Court of the Dead Book